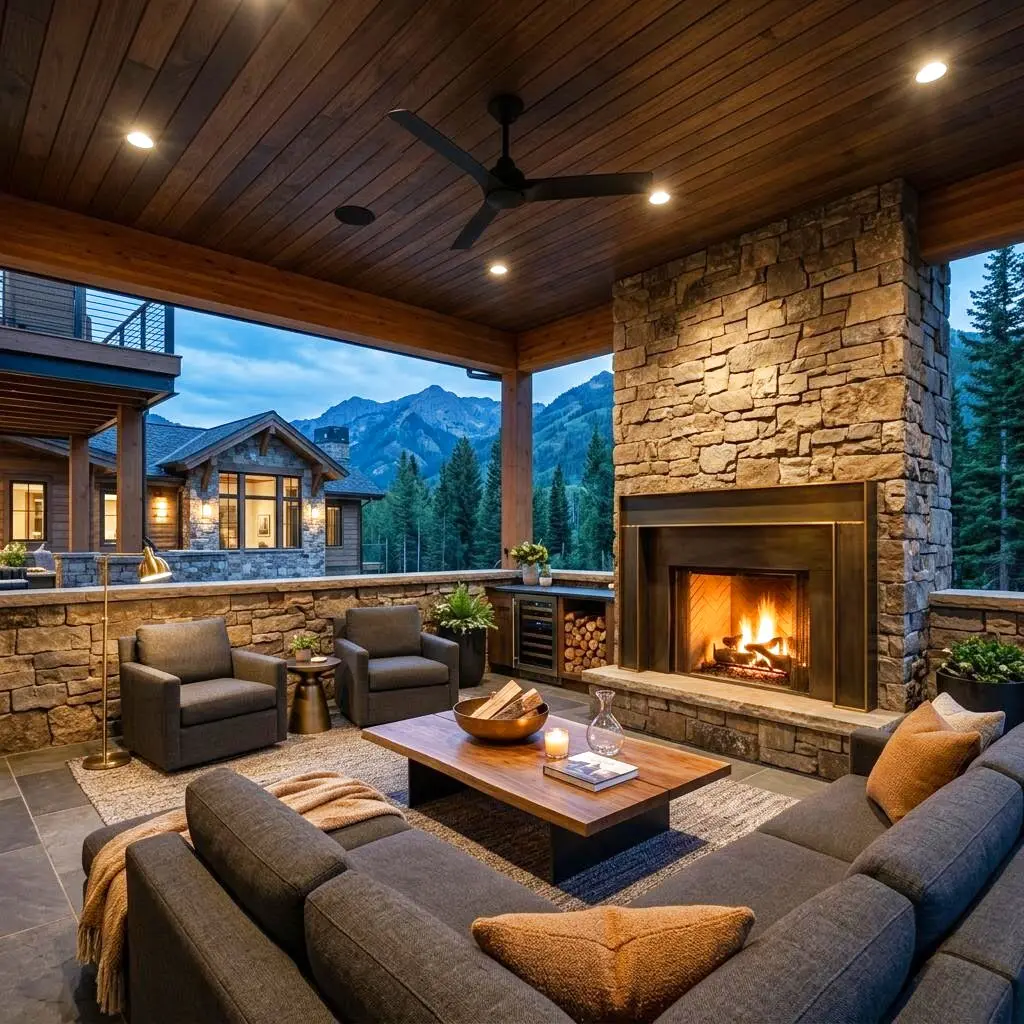
Under-Deck Outdoor Rooms
Reclaim wasted space. Create dry, luxurious outdoor living.
Service Tiers
The Dry Space
Essential drainage and ceiling finishes to keep the area dry.
- Under-deck drainage system
- Vinyl or aluminum ceiling
- Gutter integration
- Basic recessed lighting
The Patio Lounge
Elevated aesthetics with premium ceilings and environmental controls.
- Tongue-and-groove wood ceilings
- LED recessed lighting
- Ceiling fan installation
- Seamless gutter systems
- Column wrapping
The All-Season Room
A fully realized outdoor room protected from the elements.
- Premium wood ceilings
- Integrated infrared heaters
- Outdoor audio systems
- Retractable privacy screens
- Custom stonework columns
Key Benefits
- Double your usable outdoor space
- Create a dry area immune to rain and snow runoff
- Add luxury architectural details to your exterior
- Protect outdoor furniture year-round
- Seamless transition from walkout basements
Our Process
Assessment
Evaluating deck structure and drainage needs.
Drainage Installation
Installing sloped troughs to catch and divert water.
Electrical & Utilities
Wiring for lights, fans, and heaters.
Ceiling Finishing
Installing the selected ceiling materials.
Final Polish
Column wraps, trims, and testing.
Cost Guide
Reclaiming the space beneath an elevated deck is one of the most cost-effective ways to add livable square footage, with projects typically running $4k to $18k or more. The base cost is the drainage system and ceiling; everything above that — heaters, audio, privacy screens, stone columns — is where an all-season room takes shape. On walkout Utah lots this space pairs naturally with a basement patio door, and the estimates below reflect our common Wasatch Front builds.
Drainage system type
Under-joist membrane systems are economical, while under-deck panel systems that create a fully finished ceiling with integrated troughs cost more but look dramatically cleaner — often a $2k–$5k difference.
Ceiling material
Vinyl or aluminum ceilings are the value option; premium tongue-and-groove cedar or pine adds warmth and roughly $3k–$7k depending on span.
Deck height and size
Taller decks allow a comfortable standing room but require more material and safe access, while very low decks limit what's possible underneath.
Comfort systems
Wiring for recessed lighting, a ceiling fan, and infrared heaters adds electrical labor now that saves tearing down a finished ceiling later.
Enclosure level
Adding retractable screens, stone column wraps, and audio transforms a dry patio into a true all-season room, adding $4k–$8k.
Project Timeline
Assessment & measurement
2–3 daysWe evaluate the deck structure, joist condition, and slope, then measure for the drainage system and ceiling layout.
Drainage installation
2–4 daysInstalling sloped troughs or a membrane system beneath the deck boards to capture and divert all water.
Electrical rough-in
1–2 daysRunning wiring for recessed lights, fans, heaters, and audio before the ceiling closes up.
Ceiling finishing
2–4 daysInstalling the chosen ceiling material — aluminum, vinyl, or tongue-and-groove wood — plus gutter integration.
Final polish
1–2 daysColumn wraps, trim, fixture installation, and testing of the drainage and comfort systems.
Materials & Options
Under-deck drainage panels
Interlocking panels mount below the joists to form a watertight, finished ceiling that channels runoff to a gutter — the premium dry-space solution.
Cedar tongue-and-groove ceiling
Naturally rot-resistant cedar brings a warm cabin feel and stands up to the humidity swings under a Utah deck.
Powder-coated aluminum ceiling
Virtually maintenance-free and available in many colors, aluminum is ideal for low-fuss dry spaces exposed to snow runoff.
Infrared patio heaters
Ceiling-mounted infrared units warm people and surfaces directly, extending the season well into Utah's cool shoulder months.
Seamless aluminum gutters
A dedicated gutter ties the drainage system into existing downspouts so water leaves the area cleanly rather than sheeting off the edge.
Permits in Utah
A basic under-deck drainage and ceiling installation often does not require a building permit, but any electrical work for lighting, fans, or heaters does, and an inspector will verify the outdoor-rated wiring, GFCI protection, and fixtures. If the project encloses the space with permanent walls or converts it into conditioned living area, a building permit and structural review apply. We confirm the requirements with your city, pull an electrical permit when comfort systems are involved, and ensure everything meets Utah's outdoor wiring standards.
Maintenance
- Flush the drainage troughs and gutter each spring and fall to clear leaves, needles, and grit.
- Inspect the ceiling panels or boards after heavy storms for any signs of leaking or pooling above.
- Wipe down aluminum or vinyl ceilings annually; oil or reseal wood ceilings every couple of years.
- Check that outdoor light and heater fixtures remain sealed and free of moisture intrusion.
- Confirm the deck boards above still shed water properly so the system below never has to work harder than designed.
Common Mistakes to Avoid
Installing a ceiling before drainage
A ceiling that traps runoff above it leads to hidden rot and mold; the water-management layer must come first and slope correctly.
Not wiring for heaters up front
Adding infrared heaters later means removing a finished ceiling to run wiring — far more expensive than roughing it in during the initial build.
Undersizing the gutter and downspout
Utah cloudbursts and snowmelt can overwhelm a small gutter, letting water back up and spill into the very space you built to stay dry.
Using interior-grade wood
Untreated interior wood warps and rots in the humid, temperature-swinging environment under a deck, ruining an otherwise beautiful ceiling.
Related Services
Frequently Asked Questions
Request an Estimate
Tell us about your under-deck outdoor rooms project.