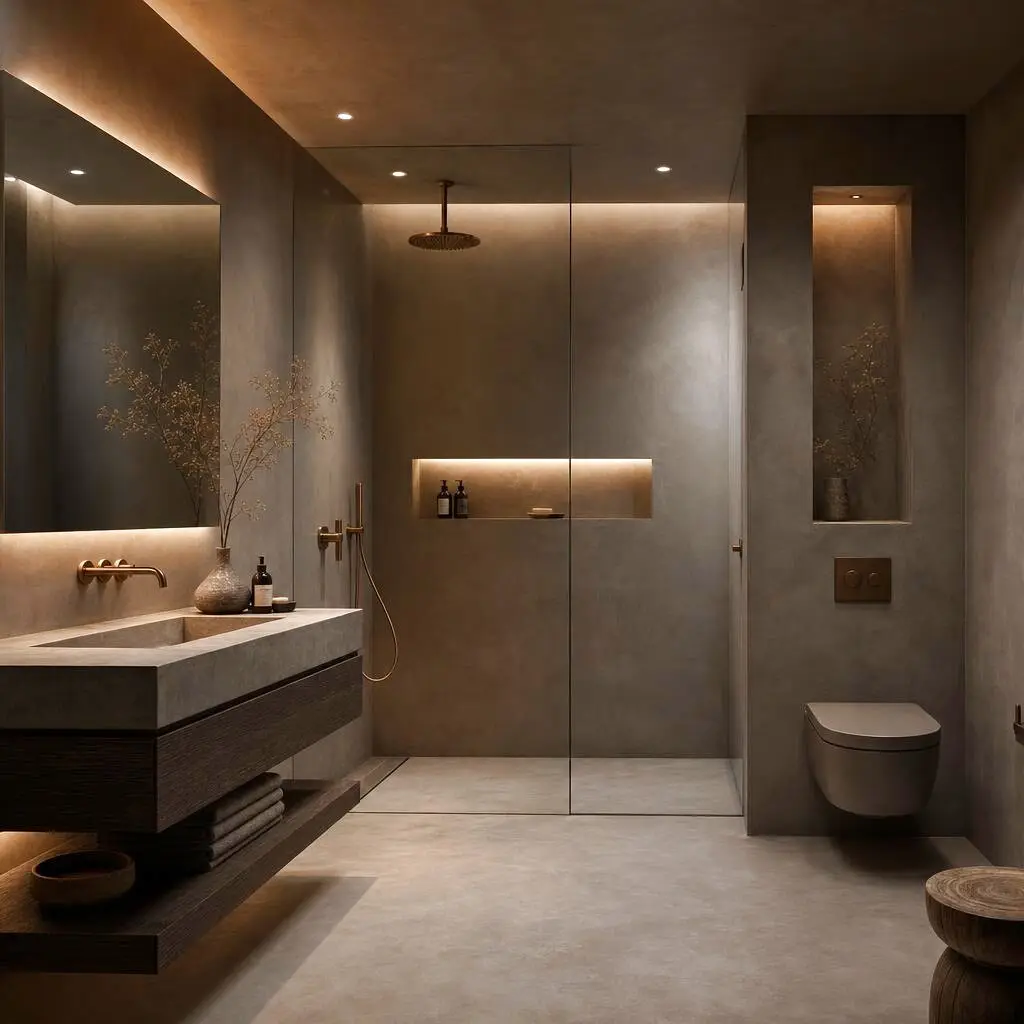
Microcement Showers & Surfaces
Seamless, grout-free, wabi-sabi luxury.
Service Tiers
The Accent Wall
A stunning, textural microcement feature wall.
- Application over existing drywall
- Custom color tinting
- Matte waterproof sealer
- Subtle, organic texture
The Seamless Shower
A grout-free, waterproof, minimalist shower enclosure.
- Full waterproofing system
- Application over existing tile (no demo required in some cases)
- Integrated shower pans
- Premium polyurethane topcoats
The Monolithic Bathroom
Complete floor-to-ceiling microcement including vanities.
- Seamless floors, walls, and ceilings
- Microcement-coated floating vanities
- Custom integrated sinks
- Ultimate spa aesthetic
Key Benefits
- Zero grout lines to clean—ever
- Can often be applied directly over old tile, saving demo costs
- Completely waterproof and highly durable
- Creates a calming, earthy, high-end spa aesthetic
- Endless custom color and texture options
Our Process
Surface Prep
Thorough cleaning, repairing, and priming of the existing surface.
Base Coats
Applying structural mesh and coarse microcement base layers.
Fine Coats
Troweling smooth, tinted layers to create the desired texture.
Sanding
Lightly polishing to achieve a buttery, monolithic feel.
Sealing
Applying multiple coats of high-grade, waterproof polyurethane sealer.
Cost Guide
Microcement pricing reflects that it is a hand-applied, multi-coat craft rather than a product you simply install. An accent wall may start around $5k, while a full monolithic bathroom with seamless floors, walls, and an integrated vanity can reach $25k or more. Because it can often go directly over existing tile, it frequently saves the demolition and disposal costs a full tile tear-out would incur. The estimates below reflect typical Wasatch Front applications.
Surface area and coats
Every square foot receives multiple base and finish coats plus sanding and sealing, so labor scales directly with area — the dominant cost driver.
Substrate condition
Applying over sound existing tile saves demolition, but cracked or water-damaged substrates must be repaired or replaced first, adding cost.
Waterproofing scope
A shower or wet-floor application requires a full waterproofing membrane beneath the microcement, adding material and labor over a dry accent wall.
Integrated features
Coating a floating vanity or forming a seamless integrated sink is intricate work that adds to a monolithic bathroom's figure.
Color and finish complexity
Custom tints and specific texture effects require more careful troweling and sample work than a standard neutral finish.
Project Timeline
Surface prep
1–2 daysCleaning, repairing, and priming the existing surface, plus waterproofing membrane in wet areas.
Base coats
1–2 daysEmbedding fiberglass mesh and applying the coarse structural base layers.
Fine coats
1–2 daysTroweling smooth, tinted finish layers to build the desired texture and depth.
Sanding
1 dayLightly polishing between and after coats for a buttery, monolithic feel.
Sealing & cure
2–3 daysApplying multiple coats of high-grade waterproof polyurethane sealer and allowing full cure before use.
Materials & Options
Two-component microcement
A polymer-modified cement that bonds to nearly any prepared substrate and cures far more flexibly than ordinary concrete.
Fiberglass reinforcing mesh
Embedded in the base coat, the mesh spans hairline movement and is the key to a crack-free finish.
Waterproofing membrane
A liquid or sheet membrane beneath the microcement makes showers and wet floors fully watertight.
Polyurethane topcoat sealer
Multiple coats of a high-grade sealer render the surface waterproof, stain-resistant, and easy to wipe clean.
Mineral pigment tints
Integral pigments produce the earthy, wabi-sabi color palette that gives microcement its calm, spa-like character.
Permits in Utah
A cosmetic microcement application over an existing, sound surface typically does not require a building permit. However, if the project includes moving plumbing fixtures, rebuilding a shower pan, or altering the bathroom layout, plumbing and building permits apply and the waterproofing and pan slope will be inspected. Because microcement in showers relies entirely on a proper waterproofing membrane, we treat wet-area substrate work to code standards regardless. We advise on what your scope requires and pull permits when fixture or structural work is involved.
Maintenance
- Clean with mild pH-neutral soap and water only; avoid bleach and acidic cleaners that degrade the sealer.
- Re-apply the topcoat sealer on high-use floors and showers every few years to maintain the waterproof barrier.
- Wipe down shower surfaces after use to minimize mineral spotting from Utah's hard water.
- Use felt pads under furniture on microcement floors to avoid scratching the sealed surface.
- Address any chips promptly with a matching patch so moisture cannot reach the substrate.
Common Mistakes to Avoid
Applying over a moving or cracked substrate
Microcement follows its base; if the tile or drywall beneath flexes or is failing, the finish will telegraph and crack.
Skipping the waterproofing membrane in showers
The sealer alone is not a substitute for a membrane, and water reaching the substrate causes hidden rot and failure.
Under-sealing the surface
Too few sealer coats leave the finish vulnerable to staining and water penetration, especially with hard Utah water.
Treating it as a DIY skim coat
The buttery, uniform look depends on skilled troweling and timing; amateur application leaves trowel marks and blotchy color that can't be easily fixed.
Related Services
Frequently Asked Questions
Request an Estimate
Tell us about your microcement showers & surfaces project.