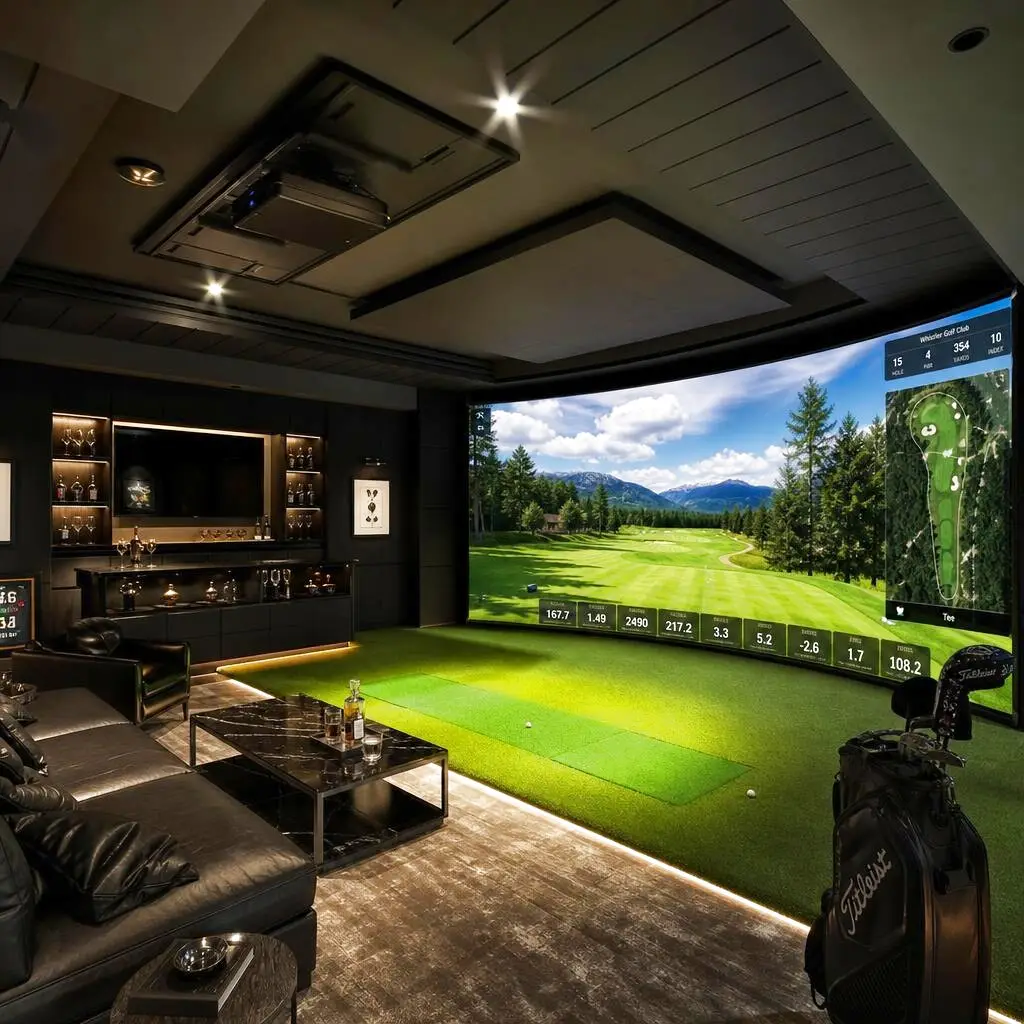
Golf Simulator Rooms
Play Pebble Beach in your basement.
Service Tiers
The Garage Bay
A clean, functional simulator build-out in an existing space.
- Impact screen and enclosure
- Premium hitting mat
- Overhead projector mounting
- Basic turf installation
The Country Club
A fully finished, immersive room with premium aesthetics.
- Custom padded wall enclosures
- Wall-to-wall putting turf
- Acoustic treatment
- Hidden wiring
- Custom cabinetry for clubs
The Tour Pro Suite
The ultimate dark, moody, ultra-luxury golf cave.
- Starlight LED ceilings
- Flush-mounted hitting strips
- Trackman/Foresight integration prep
- Bar area integration
- Acoustic wood slat walls
Key Benefits
- Golf year-round during snowy Utah winters
- Improve your game with hyper-accurate data
- Double the space as a massive home theater
- Create the ultimate entertainment space for guests
- Customized aesthetics that look like a luxury lounge, not a pop-up tent
Our Process
Space Verification
Ensuring adequate ceiling height (ideally 10ft+) and swing clearance.
Room Prep
Painting dark colors, installing acoustic treatments, and running A/V conduits.
Turf & Flooring
Leveling the floor and installing wall-to-wall putting turf with inset hitting strips.
Screen & Enclosure
Building the custom padded enclosure and tensioning the impact screen.
Tech Integration
Mounting projectors, launch monitors, and calibrating the system.
Cost Guide
A golf simulator room runs roughly $10k for a clean garage bay build-out to $40k or more for a fully finished, acoustically treated luxury lounge. Our pricing generally covers the room — the enclosure, turf, screen, acoustics, and A/V infrastructure — while the launch monitor itself is usually purchased separately and integrated by us. The estimates below reflect typical Utah basements and garages where winter-long indoor golf is the goal.
Ceiling height and space prep
Rooms short on height may need floor lowering or careful layout; adequate swing clearance is the single biggest feasibility factor.
Enclosure and screen quality
A premium multi-layer impact screen and padded enclosure cost more than a basic setup but protect the room and last far longer.
Acoustic treatment
Ball impact is loud, so wall and ceiling acoustic panels — essential in a basement — add $2k–$6k depending on room size.
Turf and hitting strip
Wall-to-wall putting turf with flush inset hitting strips costs more than a single mat but transforms the space and its look.
Finish level and A/V
Starlight ceilings, wood slat walls, bar integration, and 4K projection push a functional bay into a Tour-Pro suite.
Project Timeline
Space verification
3–5 daysConfirming ceiling height, width, and swing clearance for the players who will use it.
Room prep
4–7 daysDark paint, acoustic treatment, and running A/V conduit and power.
Turf & flooring
2–4 daysThe subfloor gets leveled and padded, then putting turf goes down wall to wall with dedicated hitting strips inset where the tee positions land.
Screen & enclosure
2–4 daysBuilding the padded enclosure and tensioning the impact screen.
Tech integration
1–3 daysMounting the projector and launch monitor and calibrating the system.
Materials & Options
Multi-layer impact screen
A tensioned, layered screen absorbs high-speed impacts quietly, resists denting, and doubles as an excellent 4K movie screen.
Commercial putting turf
Dense, true-rolling turf with an inset hitting strip gives realistic play and a clean wall-to-wall finish.
Acoustic wall panels
Fabric-wrapped absorption panels tame the loud crack of impact so the room is usable without disturbing the rest of the house.
4K short-throw projector
A bright short-throw projector fills the screen without casting shadows over the player at address.
Acoustic wood slat walls
Slat walls add a luxe lounge aesthetic while diffusing sound for the moody, high-end golf-cave look.
Permits in Utah
A golf simulator room is primarily an interior finish and A/V project, so the room itself usually does not require a building permit. Any new electrical work — dedicated circuits for the projector, launch monitor, and lighting — requires an electrical permit and inspection in most Utah cities. If the build involves lowering a slab, altering structure for ceiling height, or finishing a previously unfinished basement, a building permit applies. We identify which parts of your scope are permitted and handle the electrical permit and inspection.
Maintenance
- Vacuum the turf periodically and brush the hitting strip fibers to keep ball roll and lie consistent.
- Inspect the impact screen tension and surface for wear, retensioning as it relaxes over time.
- Keep the projector filter and lens clean so image brightness stays sharp.
- Check the enclosure padding and netting for gaps that could let a mishit ball escape.
- Update and recalibrate the launch-monitor software as the manufacturer releases new versions.
Common Mistakes to Avoid
Building in a room with too little height
Inadequate ceiling clearance forces players to shorten their swing or risk hitting the ceiling, ruining the experience and data.
Skipping acoustic treatment
The unmitigated crack of ball on screen is genuinely loud and will make a basement simulator unpleasant for the whole household.
Cheap single-layer screens
Budget screens dent, wrinkle, and wear quickly under repeated impact, degrading both play feel and projected image quality.
Poor projector placement
A projector mounted where the player casts a shadow on the screen — or where a swing can strike it — undermines the entire setup.
Related Services
Frequently Asked Questions
Request an Estimate
Tell us about your golf simulator rooms project.